You search for "how to soundproof a home office" and you get two kinds of advice: acoustic foam everywhere, or tear out your drywall. Neither one is quite right. The first barely works. The second isn't remotely practical.
The gap between "I need a quieter workspace" and knowing what actually works comes down to one distinction almost no guide explains clearly: absorption and blocking are different things, governed by different physics. Nail that distinction and the rest of the decisions almost make themselves.
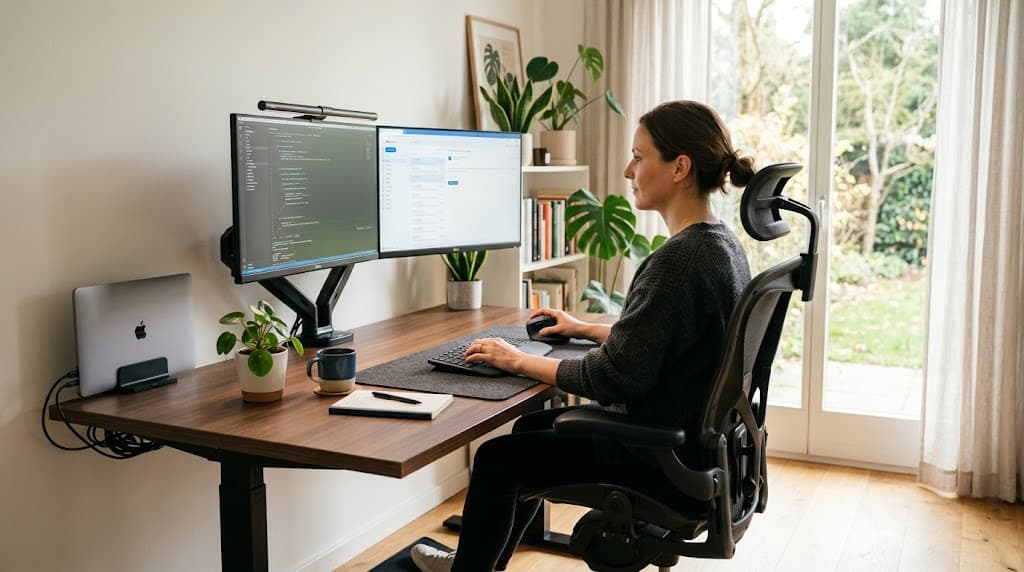
This guide walks through the steps in priority order — highest return on effort first — so you're not spending money on panels before you've dealt with the inch-wide gap under your door. For a full budget build, the home office setup under $500 guide covers the rest of the workspace alongside this.
TL;DR: The EPA recommends indoor noise below 45 dB for productivity, but the average open-plan environment runs 60–65 dB. The single highest-ROI fix is sealing door gaps, a gap covering just 1% of wall area lets through ~50% of sound energy. Start there, then layer in mass, absorption, and masking.
Absorption vs. Blocking — The Distinction That Changes Everything
Most DIY soundproofing advice fails because it conflates two mechanisms that work nothing alike. According to acoustic engineering principles, absorption reduces echo and reverberation within a room, it's about sound bouncing off hard surfaces. Blocking stops sound from traveling between spaces, it's about mass, seals, and air gaps.
Acoustic foam is an absorber. It shortens the decay time of sound inside your room, which makes your voice cleaner on video calls and reduces that fatiguing "live" quality a bare room has. What it does not do is prevent your neighbor's music from coming through the wall. For that, you need mass and sealed penetrations.
The misconception is understandable. Foam looks purposeful. Sticking panels to walls feels like progress. But if your problem is outside noise coming in, foam is solving the wrong equation entirely.
Think of it this way: a recording studio has two layers. The outer shell uses thick concrete, resilient mounts, and sealed doors to block sound. The inner shell uses absorption to control how sound behaves inside. Most home offices only need a modest version of the outer shell, and that starts with gaps.
Most soundproofing guides miss this distinction entirely. They recommend foam because it looks like soundproofing. It isn't, it's acoustic treatment, which solves a different problem in a different direction.
For a setup where audio clarity on calls matters as much as blocking outside noise, the home office video call setup guide covers the microphone and room acoustics side in detail.
Step 1 — Seal the Gaps First (Highest ROI)
A gap covering just 1% of a wall's surface area lets through approximately 50% of sound energy, a figure from acoustic engineering research on sound transmission. That reframes the whole problem. Your door doesn't need to be open to be a major sound leak. The quarter-inch gap at the bottom is enough to undo most other treatments.
This is where most home offices lose before they start: spending $80 on foam panels while ignoring the half-inch gap under the door. Seal the gaps first. Everything else is secondary.
Start with the door. A perimeter door seal kit addresses the sides and top of the door frame, where sound leaks around the edges. Combined with a door bottom seal, you're addressing every air path in one purchase.
Acoustic Door Seal Kit

Door Draft Stopper
Windows come next. Single-pane windows offer almost no acoustic resistance. If you can't replace them, the goal is to reduce the air gaps around the frame. Weatherstripping the perimeter is cheap and effective. Heavy window treatments add mass on top of that (covered in Step 2).
HVAC vents are a frequently ignored flanking path. Sound travels through ductwork well. Acoustic vent covers exist, but in a rental context, partially blocking the vent opening can reduce transmission without permanent modification.
The principle across all gap-sealing: air gaps and sound gaps are the same thing. If light can get through, so can sound.
Citation capsule: Acoustic engineering research indicates a gap representing 1% of a wall's surface area transmits approximately 50% of incident sound energy. This makes gap-sealing, particularly around doors and windows, the highest-return-per-dollar step in any home office soundproofing project, well before acoustic panels or structural treatments.
Step 2 — Add Mass to Walls and Windows
Standard interior drywall walls test at STC (Sound Transmission Class) 33–35, meaning they block moderate sound. Adding mass-loaded vinyl or resilient channels can push that rating to STC 45–52, according to acoustic construction standards. For renters, structural modification isn't realistic, but you can add effective mass without touching the walls.
Acoustic curtains are the most accessible mass upgrade for windows. Heavy, dense curtains rated for acoustic performance add roughly STC 3–5 over bare windows, on top of whatever the glass already provides. Double-pane windows add STC 5–7 over single-pane; curtains stack on top of that. In a room where the window faces a noisy street, this combination matters.

Acoustic Curtains
Bookshelves loaded with books work as improvised mass walls. A floor-to-ceiling bookshelf packed against a shared wall won't reach STC 45, but it adds meaningful mass and absorption simultaneously. It's also the only soundproofing intervention that makes your office look more thoughtful, not more studio-like.
Plants and soft furnishings contribute at the margins, not as serious acoustic barriers, but as surface irregularity that scatters sound. A dense grouping of leafy home office plants near a window or corner adds some absorption as part of a layered approach.
For renters willing to do a little more, mass-loaded vinyl (MLV) can be hung on walls or placed under rugs. It's the most effective sound-blocking material per dollar that doesn't require construction. Not pretty, but it works.
If your office doubles as a bedroom, the bedroom home office ideas guide covers the additional complexity of soundproofing a space that needs to serve two purposes.
Step 3 — Treat Surfaces for Echo Reduction
Acoustic foam reduces reverberation time, the duration sound takes to decay after a source stops, which the acoustic industry measures in RT60 values. A bare room with hard surfaces can have an RT60 of 0.5–1.0 seconds; a treated room targets 0.2–0.4 seconds for voice intelligibility. Foam doesn't block anything, but it makes your own voice cleaner and the room more comfortable for long work sessions.
Placement matters far more than coverage. You don't need to cover your walls in foam. The highest-value positions are the "first reflection points", the spots on the side walls where sound from your mouth or speakers bounces directly to your ears or microphone. Sit at your desk, hold a mirror flat against the side wall, and slide it until you can see your monitor or speaker in it. That's a first reflection point. Treat those first.

Acoustic Foam Panels
Rugs are the most underrated acoustic treatment in a home office. A hard floor reflects sound from below; a thick rug with a pad underneath absorbs those low-angle reflections and reduces footfall transmission to rooms below. In a small home office where space is tight, a single large rug does double duty as both treatment and decor.
Upholstered furniture, fabric wall art, and soft window treatments all contribute. A room furnished with soft surfaces will always sound calmer than a bare one, this is why well-furnished offices feel quieter even before any dedicated acoustic treatment.
Step 4 — Use Sound Masking When Blocking Isn't Enough
Adding 5–10 dB of broadband background noise (white or brown noise) can perceptually mask 10–20 dB of intrusive sound by changing the signal-to-noise ratio rather than reducing the noise itself. Your brain evaluates sounds relative to the ambient floor, raise that floor slightly with neutral noise and intermittent intrusions (voices, traffic, doors) become less attention-grabbing.
White noise machines work differently from noise-cancelling headphones. The machine changes the acoustic environment for everyone in the room. Headphones change what you hear. Both are valid tools, and they solve slightly different problems.

White Noise Machine
A white noise machine is useful when you're on video calls and need your room to sound neutral, or when you can't wear headphones for hours at a stretch. For focused solo work, noise-cancelling headphones are often the more targeted solution, they attenuate the noise at your ears rather than blending it into a background.
Sound masking also handles a problem physical treatments can't easily solve: flanking paths. Sound travels through floors, ceilings, and walls via structural vibration, not just through air. If your neighbor's bass is coming through the building structure, sealing your door gaps won't stop it. Masking is often the only practical counter for flanking noise in a rental context.
Citation capsule: Acoustic psychophysics research demonstrates that introducing 5–10 dB of broadband masking noise can perceptually mask 10–20 dB of intrusive intermittent sound. The mechanism is signal-to-noise ratio adjustment, the auditory system evaluates sounds relative to an ambient floor, not in absolute terms. White noise machines exploit this to reduce the perceived impact of noise that can't be physically blocked.
What About Renter-Friendly Soundproofing?
The EPA recommends indoor residential noise levels below 45 dB for sustained concentration, but most rental leases prohibit structural modifications (EPA). The good news is that the gap between "no modifications" and "meaningful improvement" is smaller than most people assume.
A practical renter-friendly stack, in priority order:
- Door seal kit + draft stopper (~$30–60): the single highest-ROI purchase, fully removable
- Acoustic curtains (~$40–80): hang on existing or tension rods, no drilling required
- Area rug with pad (~$60–120): immediate improvement, doubles as decor
- Acoustic foam panels (~$30–50): command strips are removable on painted walls
- White noise machine (~$50–80): no installation, portable
Total for the full stack: roughly $210–390. You won't reach STC 45–52, but you'll clear the EPA's 45 dB recommendation in most typical apartments.
Our finding: This priority order comes from building out a home office in a shared apartment building. The door seal kit alone made a more noticeable difference than the foam panels and curtains combined, by a wide margin. If you only do one thing, do that first.
What genuinely doesn't work in rentals without construction: resilient channels, staggered-stud walls, and double-drywall assemblies. If you own your space, they're worth researching. If you don't, the stack above is your toolkit.
Impact Ranking: Where to Spend Your Effort
The chart below shows the relative acoustic impact of each approach, based on acoustic engineering principles, ranked by practical effect on perceived noise reduction.
Frequently Asked Questions
Does acoustic foam actually block sound from entering my home office?
No. Acoustic foam absorbs echo and reverberation within the room, it shortens the time sound takes to decay after bouncing off hard surfaces. It does almost nothing to prevent sound from traveling through walls, doors, or floors. Blocking requires mass and sealed air gaps. These are different tools for different problems.
What's the highest-ROI first step for soundproofing?
Seal the door. A gap representing just 1% of a wall's surface area passes approximately 50% of sound energy. A door seal kit ($30–60) and a draft stopper address the most common sound leakage path in any room. No other single purchase comes close on a per-dollar basis.
Can I soundproof my office without drilling or making permanent changes?
Yes, with meaningful results. Door draft stoppers require no drilling. Acoustic curtains hang on tension rods. Foam panels can use removable command strips. Bookshelves and rugs need no installation at all. A full renter-friendly stack runs $150–270 and makes a real difference, not studio-quality, but enough for focused work.
How much does basic home office soundproofing cost?
A practical starter stack, door seal kit, acoustic curtains, foam panels, and a white noise machine, costs roughly $150–270. That covers the highest-impact interventions without permanent modification. Structural upgrades (mass-loaded vinyl, resilient channels, double drywall) cost more but reach STC 45–52, which approaches professional treatment levels.
Where to Go From Here
Soundproofing a home office is a layered problem, but it has a clear priority order. Seal gaps first, especially the door. Add mass second. Treat surfaces for echo third. Use sound masking to handle what physical treatment can't reach.
Most people who work through that sequence in order find they don't need every step. Sealing the door and adding heavy curtains often resolves 80% of the problem. Foam panels and a white noise machine handle the remaining edge, or the cases where work demands near-studio quiet.
The EPA's 45 dB indoor noise recommendation isn't arbitrary, sustained noise above that level is measurably linked to reduced concentration and increased fatigue. You don't need to reach studio silence. You need to get under that threshold consistently.
If you're building out the rest of your workspace, the home office video call setup guide covers audio and acoustics from the other direction, how to sound good on calls, not just work quietly. And if noise-cancelling headphones are a parallel solution you're considering, the best noise-cancelling headphones for work guide covers every price tier.
Start with the door. The rest follows naturally.